As a fan of Scotland – I’v spent 8 sommers walking in Scotland – I have released a map of Scotland with extreme high details at low zoom-levels. The mapping is the same as for Iceland.
For the lowlands this is in parts a kind of overkill, there you can use the Great_Britain map.
However, for walkers and cyclists able to withstand midges and ocasional showers, walking the Hebrides, the Orkneys, the Shetlands, Skye aso. this map is a great addition to the portfolio.
A great walk in one of the most beautiful nature scenes in Europe
and
Best regards, Christian
… and don’t forget to drink a pint of Guinness to my health …
Hello,
Two weeks ago I moved this website from a shared account to a VirtualPrivateServer wit 8GB Ram and 2Vcores.
In addition I moved the critical parts like js, css and pictures to ContentDeliveryNetwork.
This eliminates the need of questionable and sometimes inkompatible tricks like Browser caching, minifying aso..
Advantage: Usualy the pages are now delivered in less than 2sec to all kinds of browsers
Downside: Costs 378.–€/Year
Anyway, I don’t like to stop half the way – so enjoy it.
Best regards, Christian
Hello,
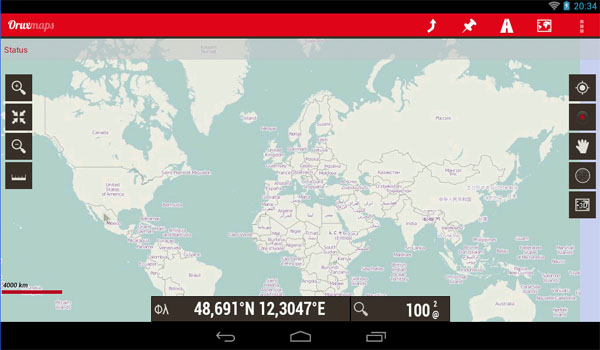
For Locus and Oruxmaps there are general maps in zoom-levels 4-9 covering the whole world for download.
These maps are perfect for overview and switching to the detailed Vectormaps for navigation.
The format of the maps is sqlite (bitmaps) for faster handling in these zoom-levels.
- Oruxmaps: Please decompress the zipfile and copy the whole World_OSM folder to the map-folder on the smartphone.[download]
- Locus: Decompress the file and copy WorldOSM_Locus.sqlitedb in the \maps – folder on the smartphone (\maps , NOT \MapsVector!)[download]
While the first loading of the maps (or starting the app after copying the maps on the phone) these maps have to initialised – this may take a while, but only once.
Best regards, Christian
Hello,
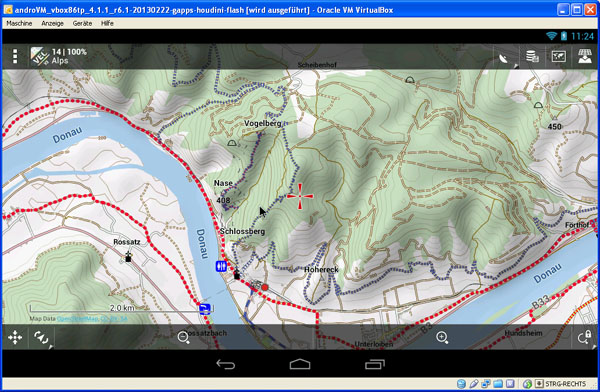
there is a frequent wish to use Openandrompas on a Windows PC, particularly planning and administration of routes and tracks
The truth is: there is no straightforward way to use Mapsforge vector maps under Windows.
HOWEVER: Android developers rarely test their apps on a real smartphone or tablet in the first place, but use a virtual Android machine.
(Android 4.1-Tablett in einem Fenster unter Windows)
What does this mean ?
It’s an operating system inside an opertating system, i.e. Android is just a Window under Windows. And this is what
you need for it:
- VitualBox
http://download.virtualbox.org/virtualbox/4.2.12/VirtualBox-4.2.12-84980-Win.exe - Tools for Virtualbox (essential as well)
http://download.virtualbox.org/virtualbox/4.2.12/Oracle_VM_VirtualBox_Extension_Pack-4.2.12-84980.vbox-extpack - Tablett Android, rooted inlc. GooglePlay:
http://androvm.org/Download/androVM_vbox86tp_4.1.1_r6.1-20130222-gapps-houdini-flash.ova
And here are English Keyboards:
https://www.google.at/search?q=english+keyboard&client=firefox-a&hs=IPP&rls=org.mozilla:de:official&tbm=isch&tbo=u&source=univ&sa=X&ei=lfyqUaCqPMbasgau0IGwBQ&ved=0CDQQsAQ&biw=1320&bih=695
The English keyboard is required only for first start and installation, as the QWERTY keyboard is the default in AndroVM. E.g. the @ is SHIFT-2, which you need to specify your google account
And here we go:
- In 64 bit Windows first activate CPU virtualization in BIOS – with 32 bit it should work without that.
If this option is not offered or does not work, then go to AndroVM settings and define only one processor to be used. Also deactivate “VT-x/AMD-V” via Change/System/Acceleration. Multiple cores only add limited value, as Mapsforge uses one kernel only. - Then set a system restore point, just to be safe.
- Next install the components of above SW list in the given order, using default values. You have to have network connection for proper network setup. Ignore the many warnings from WIndows etc.
If you have a firewall, allow VM !! - Start the ANdroid VM – back/home buttons still missing; use ESC instead so far.
- Sign into your google account, using same id as on your smartphone (get help from English keyboard layout from above). In case you prefer non-English keyboard, you now can switch to your language.
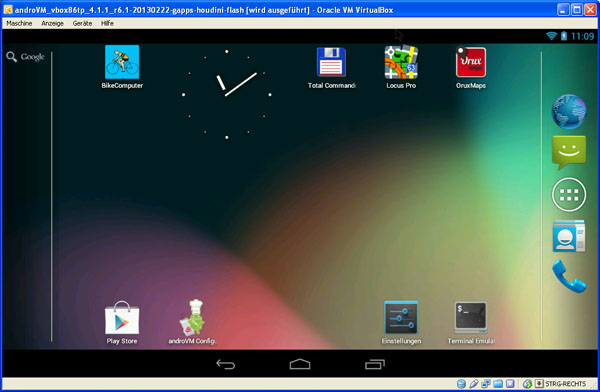
- Now you can install your apps from GooglePlaystore; it may take 10-15 min until your new “tablet” is recognized by Playstore. After that you do not need to pay again for your existing apps.
- Install “TotalCommander”, a great, root enable file manager.
- To get a status bar in your VM, use the app “AndroVM-Config” and set “force statusbar”. Android will now reboot and you will then see the HW buttons at the bottom. You need to redo this after each each full
shutdown of the VM. You can safe the current state instead, though, when closing the VM.
Now we have Android in VM working, but it is a closed universe for now.
How do we get our files in (maps, themes etc.) and out (routes, POIs etc.) ?
This is where “shared-folders” come into play, which can be defined in the AndroVM settings. I.e. we define which Windows folders we are going to use for data exchange (and do it right now …). Here is an example:
- c:AndroExchange
- c:AndroExchangemaps
- c:AndroExchangethemes
- c:AndroExchangepois
- usw….
Then shut down AndroidVM fully and select “Change” to see its properties. Click “shared folder” add your folder (“c:\AndroExchange\” in our example) via the green “+”. If an Android names like “AndroExchange” does not work, then the Android name should be “mysdcard”. Select “automatic connect”.
Now restart the VM, set the force status bar, reboot Adroid and start
Totalcommander. The shared folders are in /mnt/shared.
Congratulations – now you can copy back and forth between Windows and
Android VM.
Beste Regards and thanks to Michael for translating,
Christian